


Safe hypodermic needle use means selecting the correct device, applying aseptic technique, and following disposal protocols to prevent infection and needlestick injuries. Proper selection, handling, and disposal reduce bloodborne pathogen transmission by limiting exposure, maintaining sterile access, and ensuring safe waste containment. This article explains core safe injection practices, strategies to prevent needlestick injuries, regulatory and practical sharps disposal guidance, needle selection and handling, step-by-step administration procedures, and post-exposure response actions for healthcare professionals and home caregivers.
What Are the Key Safe Injection Practices to Follow?
Safe injection practices are standardized actions that prevent infection and injury by ensuring each injection is performed with sterile supplies, correct technique, and immediate safe disposal. These practices work through a combination of aseptic technique, single-use equipment, and validated handling of medication, which together reduce contamination risks and preserve patient safety. Hand hygiene, skin disinfection, verification of medication and dose, and use of single-use syringes are central elements that minimize microbial transmission and dosing errors. The following subsections detail aseptic mechanics and the three core steps to follow for every injection, and they build toward device selection and disposal strategies that close the safety loop.
How Does Aseptic Technique Ensure Injection Safety?
Aseptic technique prevents introduction of pathogens during injections by combining hand hygiene, appropriate PPE, sterile equipment, and surface disinfection to create a transient sterile field. Performing handwashing or using alcohol-based hand rub before preparation and donning clean gloves limits transient flora that can contaminate vials, syringes, or skin. Skin preparation with an appropriate antiseptic such as 70% isopropyl alcohol or chlorhexidine gluconate and allowing it to dry reduces local microbial load at the puncture site, and using single-dose vials or strict multi-dose vial protocols prevents cross-contamination. Consistently following these steps reduces infection rates and supports downstream practices such as correct needle selection and safe disposal of used devices.
What Are the 3 Core Steps of Safe Injection Practices?
The three core steps of safe injection practices—prepare, administer, and dispose—provide a simple framework that applies across clinical and home settings. Prepare means verify patient identity, medication, dose, route, and expiry, then assemble sterile supplies using aseptic technique to draw medication. Administer involves site selection, appropriate needle gauge and length, correct insertion angle, and controlled delivery while minimizing tissue trauma. Dispose requires immediate placement of used needles and syringes into an appropriate sharps container without recapping or passing uncapped devices, which completes the safety cycle and prevents needlestick risk.
- The three-step approach keeps procedures consistent across teams and settings.
- Each step supports the next: sterile preparation reduces contamination risk during administration, and immediate disposal prevents post-procedure injuries.
- Following these steps routinely enables compliance with institutional policies and reduces adverse events.
These core steps lead naturally into engineering and administrative safeguards that further reduce needlestick injuries.
How Do You Prevent Needlestick Injuries Effectively?
Preventing needlestick injuries combines engineering controls, administrative policies, and safe work practices to eliminate hazards and limit exposure when elimination isn't possible. Engineering controls include safety-engineered devices such as retractable needles, needle shields, and needleless connectors that reduce the chance of percutaneous injury by redesigning the device. Administrative controls encompass training, standard operating procedures, and reporting systems that reinforce safe behaviors, while work-practice controls—like the no-recap policy and one-handed transfer techniques—change how staff handle needles during and after use. Implementing these layers together creates redundancy that lowers overall risk and supports safer workflows in clinics, hospitals, and home care.
What Safety-Engineered Devices Reduce Needlestick Risks?
Safety-engineered devices—retractable syringes, passive needle shields, and needleless IV connectors—reduce injuries by removing or covering the needle immediately after use or by eliminating the needle entirely. Retractable syringes withdraw the needle into the barrel on activation, which prevents exposure during handling and disposal; passive shields automatically cover the needle without extra steps. Needleless connectors remove the need to access the vascular system with a sharp, lowering exposure in infusion settings. Training on device activation and compatibility with clinical workflows is essential to ensure expected risk reduction and clinician acceptance.
| Safety Device | Activation Method | Risk Reduction / Recommended Setting |
|---|---|---|
| Retractable syringe | Plunger-activated needle retraction | High reduction; recommended for point-of-care injections and outpatient clinics |
| Needle shield (passive) | Automatic shield deploys on withdrawal | Moderate-high reduction; useful in infusion centers and labs |
| Needleless connector | Valved connection for IV access | High reduction for IV therapy; recommended in inpatient and home infusion settings |
This comparison clarifies how different device mechanisms match clinical needs and supports device procurement that aligns with safety goals.
Why Is the No-Recap Policy Important for Injury Prevention?
A strict no-recap policy decreases needlestick injuries by eliminating the risky action of placing a cover back onto a used needle, which is a frequent cause of percutaneous exposure. Instead of recapping, immediate disposal into an accessible puncture-resistant sharps container or using one-handed scoop techniques when unavoidable prevents two-handed handling that increases injury probability. Administrative enforcement, staff education, and the availability of safety-engineered devices and conveniently located sharps containers facilitate adherence to no-recap rules. Reinforcing no-recap policy during training and audits reduces incidents and ensures safer post-procedure workflows for all staff and caregivers.
- No-recap reduces direct hand-to-needle contact following use.
- Substituting recapping with immediate disposal or one-handed techniques lowers exposure rates.
- Policy enforcement and device access are necessary to sustain compliance and reduce injuries.
Together, device selection and no-recap practices significantly cut needlestick risks and prepare teams for safe disposal strategies covered next.
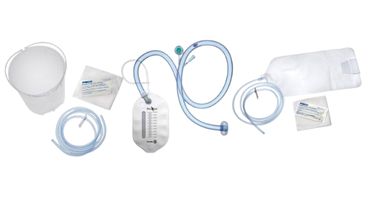
What Are the Best Guidelines for Sharps Disposal?
Effective sharps disposal relies on choosing an FDA-cleared sharps container with key safety features, following regulated disposal pathways, and training staff and home users on proper filling and transport. Containers should be puncture-resistant, leak-proof, have a secure lid, and include a clear fill line to prevent overfilling; these features collectively reduce accidental exposures during use, storage, and transport. Clinical settings follow institutional policies for temporary storage and regulated waste pick-up, while home users must follow local government or community program options, such as designated collection sites or mail-back programs where permitted. The table below maps container features to safety benefits and practical implications to simplify selection and use.
The following table compares important sharps container features and their real-world safety benefits to aid selection for clinical and home use.
| Container Feature | Safety Benefit | Practical Implication |
|---|---|---|
| Puncture-resistant walls | Prevents needle penetration and injuries | Use in high-volume clinical areas and home storage to reduce leakage risk |
| Secure, locking lid | Prevents unauthorized access and spills | Choose containers with locking mechanisms for transport and storage |
| Clearly marked fill line | Reduces overfilling and accidental exposure | Train staff to seal and replace container at fill line |
| Leak-proof base | Prevents fluid escape during handling | Required for handling contaminated sharps and transport compliance |
Selecting a container with these attributes simplifies compliance and lowers exposure risk for staff and household members who handle used sharps.
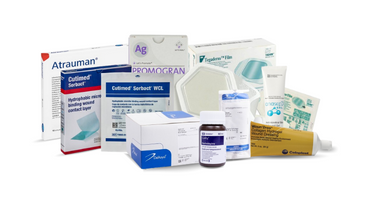
Because product selection helps operationalize safe disposal, clinical teams and home caregivers benefit from readily available supply options. Medsitis supplies a range of sharps disposal containers and related supplies; their product categories include FDA-cleared puncture-resistant containers with secure lids and visible fill lines to support compliant disposal in both clinical and home environments. Choosing properly featured containers and training on fill-line use ensures consistent, safe disposal across settings.
How Do FDA-Cleared Sharps Containers Support Safe Disposal?
FDA-cleared sharps containers are designed to meet safety and performance standards that reduce percutaneous injuries and environmental contamination by providing puncture-resistant construction, a secure locking lid, and clear sealing features. These containers are tested to withstand typical clinical stresses and to resist needle penetration through sidewalls and lids, which decreases accidental exposures during disposal and storage. Containers with a clear fill-line guide users to replace containers before overfilling, lowering the likelihood of protruding sharps that can cause injuries. Selecting the right container capacity and features for the setting—bedside, procedure room, or home—makes disposal safer and more convenient.
- Use smaller containers for point-of-care and larger units for operating rooms or high-volume clinics.
- Locking lids help during transport to final disposal and reduce tampering risk.
- Visible fill-lines enable staff to monitor usage and plan timely replacement.
These container attributes integrate with institutional disposal workflows and support compliance with local regulations, which vary by jurisdiction.
What Are the Regulations for Home Sharps Disposal?
Home sharps disposal regulations differ by state and locality, so users should consult local health departments for specific requirements, but common options include community drop-off programs, household hazardous waste collection events, and mail-back or take-back programs where permitted. Safe interim storage in a labeled, puncture-resistant container placed out of reach of children and pets reduces household risk until a permitted disposal route is available. Transport should use sealed containers with lids locked and follow local rules for handing over to designated programs. Community-based solutions and clear guidance from local authorities make home sharps disposal both safe and legally compliant.
- Check local health department resources for accepted disposal pathways.
- Store containers in a secure area until collection or drop-off.
- Mail-back programs provide regulated endpoints where available and accepted.
Understanding local rules and using FDA-cleared containers with secure lids supports safe home disposal and reduces community exposure.
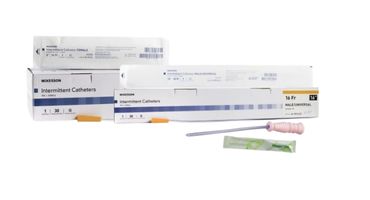
How Do You Choose and Use Hypodermic Needles Safely?
Choosing a hypodermic needle involves matching gauge and length to injection type, patient characteristics, and medication viscosity to balance efficacy, patient comfort, and safety. Needle type (Luer lock vs. Luer slip), bevel design, and coating affect dosing accuracy and pain; for example, Luer lock hubs provide more secure syringe attachments for procedures requiring torque or aspiration. Handling practices—using single-use needles, avoiding recapping, and ensuring proper transfer to sharps containers—prevent contamination and injuries. The table below maps common injection types to recommended gauge and length ranges to guide selection while accounting for factors such as patient age and body habitus.
Before the table, note that needle selection optimizes delivery and minimizes tissue trauma; the following mapping provides general clinical guidance that should be adjusted by clinician judgment.
| Injection Type | Recommended Gauge Range | Typical Needle Length | Best Use / Patient Factors |
|---|---|---|---|
| Intramuscular (IM) | 22–25 G | 1–1.5 inches | Adults depending on muscle mass; longer for obese patients |
| Subcutaneous (SC) | 25–30 G | 3/8–5/8 inch | Vaccines, insulin; adjust for pediatric vs. adult patients |
| Intradermal (ID) | 26–30 G | 3/8 inch or shorter | Allergy or TB testing; shallow depth needed |
This comparison helps clinicians and caregivers select needles that balance efficacy and comfort, with adjustments for pediatric patients and patients with higher BMI.
What Needle Gauge and Length Are Best for Different Injections?
Needle gauge and length selection are driven by the injection route, medication characteristics, and patient anatomy; intramuscular injections typically require wider gauges and longer lengths for adequate muscle penetration, while subcutaneous injections use finer gauges and shorter lengths to deposit medication in adipose tissue. For example, IM vaccines in adults often use 22–25 gauge needles at 1–1.5 inches, whereas insulin injections use 28–31 gauge at 3/16–5/16 inch depending on insulin formulation and patient subcutaneous thickness. Pediatric patients and low-body-mass adults usually require shorter needles to avoid intramuscular placement where subcutaneous is intended. Choosing the correct combination improves absorption, reduces pain, and lowers the risk of complications like nerve or tissue injury.
How Do Needle Types Affect Injection Safety and Comfort?
Needle design—including bevel angle, shaft coating, and hub type—impacts tissue trauma, ease of insertion, and secure attachment to syringes, affecting both patient comfort and clinical safety. A fine-gauge needle with a sharp, longer bevel can reduce insertion pain and minimize tissue disruption, whereas a thicker gauge may be necessary for viscous medications to ensure proper flow. Luer lock hubs reduce accidental detachment during aspiration or agitation, improving dosing accuracy in procedures that demand secure coupling. Proper selection paired with gentle technique reduces pain, improves patient adherence to therapy, and lowers the chance of dosing errors or device-related incidents.
- Bevel design influences cutting efficiency and pain perception.
- Hub type (Luer lock vs. Luer slip) affects mechanical stability during use.
- Coated needles reduce friction during insertion and withdrawal, improving comfort.
Choosing needle types that align with clinical needs and patient comfort supports safer and more effective injections, and when in doubt, consult device specifications from reputable suppliers.
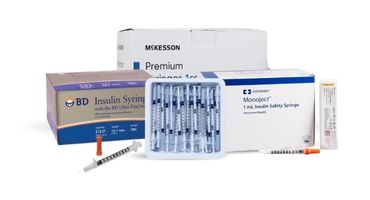
Medsitis provides needle and syringe product categories that illustrate common options available for different injection types, offering a selection to match clinical needs without replacing clinician judgment. Using reputable suppliers for single-use needles and compatible syringes supports adherence to single-use policies and supply continuity.
What Are the Step-by-Step Procedures for Safe Injection Administration?
A stepwise approach to injection administration—verification, preparation, administration, and post-care—ensures safety and consistency across clinical and home settings. Verification includes five rights (patient, drug, dose, route, time) and allergy checks to prevent medication errors. Preparation uses aseptic technique to draw medication into a single-use syringe while avoiding contamination, and administration follows route-specific insertion angles and speeds to optimize delivery. Post-care includes immediate disposal of sharps, observation for adverse reactions, and documentation of the procedure to complete the safety cycle.
How Should Medication Be Prepared to Ensure Safety?
Medication preparation begins with verifying the patient and prescription details, checking vial or packaging integrity, and confirming the correct diluent and expiration date to avoid dosing errors. For multi-dose vials, follow strict aseptic practices and organizational policies to prevent cross-contamination; use single-use syringes and never reuse needles. Draw medication using a sterile syringe, expel air bubbles carefully, and label drawn syringes if there is any delay before administration. These preparation steps reduce contamination risk and support accurate, safe medication delivery.
- Verify five rights before preparation.
- Use single-use syringes and aseptic technique for drawing medication.
- Label prepared syringes if delay is anticipated.
Careful preparation sets the stage for correct administration technique and safe disposal.
What Is the Correct Technique for Administering Injections?
Correct administration technique varies by route but universally includes site selection, skin disinfection, steady insertion, controlled delivery, and prompt withdrawal followed by safe disposal. For intramuscular injections insert at a 90-degree angle after stretching or displacing tissue as appropriate, and for subcutaneous injections insert at 45–90 degrees depending on needle length and patient. Avoid routine aspiration unless the medication or institutional policy requires it, and inject at a steady pace to minimize pain and tissue trauma. After withdrawal, apply gentle pressure and monitor the patient for immediate reactions, then place the used syringe and needle directly into a sharps container without recapping.
- Prepare the site: Clean and allow to dry before insertion.
- Insert at the correct angle: 90° for IM, 45°–90° for SC based on needle and patient.
- Withdraw and dispose immediately: No recapping; deposit into a puncture-resistant container.
Following these steps minimizes tissue damage, maintains dosing accuracy, and prevents needlestick injuries through immediate disposal.
How Should Healthcare Professionals Respond After a Needlestick Injury?
When a needlestick injury occurs, immediate actions focus on minimizing potential bloodborne pathogen transmission and initiating reporting and medical evaluation quickly. Prompt wound care—wash the area with soap and water without squeezing the wound—reduces superficial contamination, and reporting to a supervisor or occupational health team starts exposure evaluation and documentation. Early notification enables timely consideration of post-exposure prophylaxis (PEP) based on the exposure risk and source status; occupational health determines testing and treatment timelines. The following subsections outline immediate first-aid steps and recommended timing for medical assessment and follow-up.
What Immediate Actions Minimize Bloodborne Pathogen Transmission?
Immediate first aid after a needlestick injury includes encouraging the wound to bleed briefly without squeezing, gently washing the area with soap and water, and covering it with a clean dressing to reduce surface contamination. Do not scrub or apply caustic agents, and do not attempt to suck or squeeze the wound as this can increase tissue trauma. Notify your supervisor and occupational health or designated exposure response team immediately to document the incident and begin exposure risk assessment. Early and proper first aid facilitates faster evaluation for potential PEP and baseline testing, which improves the ability to manage infection risk appropriately.
- Wash with soap and water promptly and avoid harsh manipulation of the wound.
- Report the incident immediately to ensure timely occupational health action.
- Preserve any information about the source patient and device for assessment.
These actions prepare clinicians and patients for the next phase: formal medical evaluation and follow-up.
When Should Medical Evaluation and Follow-Up Occur?
Medical evaluation should occur immediately after reporting a needlestick injury so occupational health can assess exposure severity, perform baseline testing, and determine the need for post-exposure prophylaxis within established windows. Baseline blood tests for the exposed individual and, when available and with appropriate consent, testing of the source patient help guide therapy decisions; PEP effectiveness is time-sensitive for certain pathogens and protocols vary by risk. Follow-up testing schedules typically include repeat serology at recommended intervals per institutional policy and public health guidance to confirm or rule out seroconversion. Documentation of the incident, counseling, and mental health support are integral parts of follow-up care.
- Seek medical evaluation without delay to maximize PEP effectiveness if indicated.
- Baseline and follow-up testing timelines are determined by exposure type and local policy.
- Keep clear records of the event to support clinical and occupational health follow-up.
Timely evaluation and consistent follow-up reduce long-term risk and ensure appropriate care after occupational exposures.